
I currently started to test machine learning algorithms to predict the results of football matches. I especially tried to use neural networks. But I soon realized, that the possibilities of R regarding neural networks are a little bit limited. So I want to take a look at TensorFlow. TensorFlow is a machine learning library provided by Google, which was already used for many different use-cases and proved its suitability.
As the installation process for TensorFlow was not self-explanatory, I thought, it would be a good idea to provide a small installation guide. I want to explain, how I installed TensorFlow and the Python GUI PyCharm.
Installation TensorFlow
I have chosen to install TensorFlow in an Anaconda environment. You have to take following steps to install TensorFlow:
(1) Download latest Anacondo version from the homepage Anaconda download site
(2) Follow the instructions and install Anaconda
(3) Create a conda environment named tensorflow by invoking the following command
C:> conda create -n tensorflow python=3.5
Update: With the new Version of Anconada, this can be done through the GUI.
(4) Activate the conda environment
C:> activate tensorflow
(tensorflow) C:> # Your prompt should change
(5) Now you have to install TensorFlow into your Anaconda environment. Therefor you have to choose, whether you want to use the CPU or the GPU version.
Install CPU version:
(tensorflow)C:> pip install --ignore-installed --upgrade tensorflow
Install GPU version:
(tensorflow)C:> pip install --ignore-installed --upgrade tensorflow-gpu
Now TensorFlow is installed. The next steps include installing and configuring PyCharm as the Python GUI.
Installation PyCharm
(1) Download latest PyCharm version from the homepage PyCharm download site
(2) Follow the instructions and install PyCharm
Configure PyCharm
(1) Start PyCharm
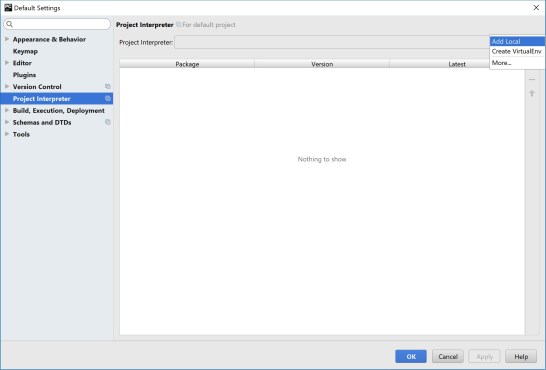
(2) At the welcome-screen click “Configure” -> “Settings”
(3) Now you have to add the created Anaconda environment as a new local project interpreter
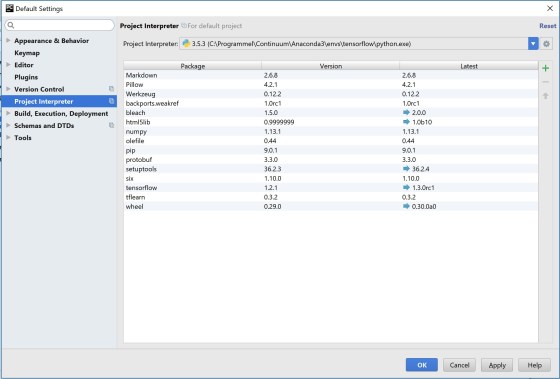
(4) You can find the created tensorflow Anaconda environment at the subfolder “env” in your Anaconda installation folder. You have to select the “python.exe” inside that environment folder.

(5) If everything is correct, you are able to see TensorFlow as an available package.
(6) Create a new project and enter following small program:
import tensorflow as tf
hello = tf.constant('Hello, TensorFlow!')
sess = tf.Session()
print(sess.run(hello))
If you execute the code, you should receive following result:
Hello, TensorFlow!
Now you are able to use PyCharm as your Python GUI to develop machine learning algorithms with TensorFlow.
In a separate post I will describe how you can use TensorBoard to visualize the learning process of a neural network.
Update (2018/05/27):
Update Anaconda installation
After a while, you might need to update your Anaconda installation. I my case it was caused by the available Python version. A package, I tried to install, needed a Python version >= 3.6, but the original installation contained only version 3.5.
Updating a Anaconda installation is quite simple. You just need to execute:
c:\conda update anaconda
After that, you might have to recreate your specific conda environment.
When switching the Python version, this step is needed. Removing an
environment is done with the remove parameter.
c:\conda env remove -n tensorflow
If you have further questions, feel free to leave a comment or contact me @Mo_Nbg.

4 Replies to “How To: Install TensorFlow for Windows”