
There is one big reason, why I have chosen Exasol as a database for my football analytics and predictions: Exasol is capable of executing Python and R code inside the database. Your are able to put your statistical calculations and predictive models to your data. The feature User Defined Functions (UDFs) provides the possibility to implement every logic which you normally code in Python or R. This is a really efficient way to extent plain SQL with some predictive functionality like the execution of TensorFlow models.
In this blog post I will explain, how you extend the Exasol community edition with all needed Python3 packages to execute Tensorflow models. Additionally with the latest update I also added the packages and description needed for all my web scrapping scripts.
Preliminaries
The Exasol Community Edition is running as VM image. Internally Exasol uses docker to execute the different programming languages. But working with windows, these both technologies does not really work together. That’s why there have to be done some preparations before you can start creating a TensorFlow container.
Create Ubuntu VM
As you are not able to run Docker and VMWare in parallel on Windows, I decided to create a separate Ubuntu VM for all Docker task. Of course you can also use any other free Linux distribution.
The Ubuntu Serve ISO is available under following link:
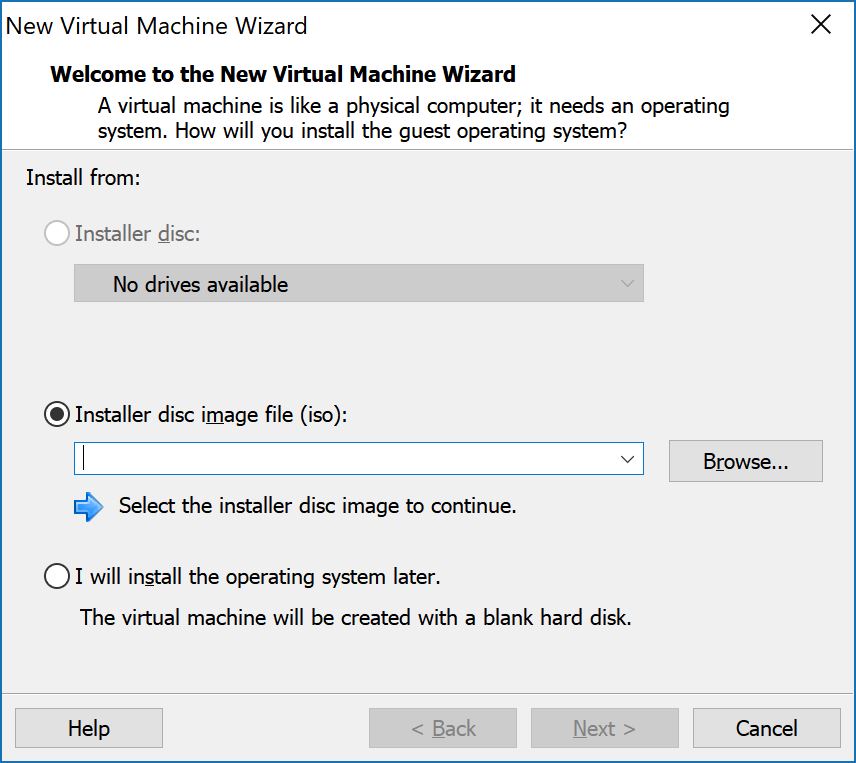
While creating a new virtual machine you just have to select the downloaded ISO to use Ubuntu as an OS.
During the installation of Ubuntu you have to define the user & password, which you use later to login to the VM.
Other tools
To simplify the work with the different VMs I also used following tools, which I can just recommend everybody.
Putty – Putty is a slim SSH client, to connect and work with the command line of the Ubuntu VM. That’s just way more enjoyable as using the small VMWare window.
WinSCP – WinSCP is a open source SFTP file transfer client. That’s the easiest way to exchange files with the Ubuntu VM without thinking about shared folders or curl commands.
MobaXterm – MobaXterm is basically a Linux bash console for Windows and a SSH Client. It offers more functionality than Putty.
To get all tools work, you have to install a SSH server on your Ubuntu VM. This may be possible during the Ubuntu installation process. Otherwise start the new created Ubuntu VM and execute following command:
sudo apt-get install openssh-server
Install Python 3.6
Creating the script languages containers requires Python >= 3.6 with pip. Use following command to install Python3.6:
sudo apt-get install python3.6
sudo apt install python3-pip
Install Docker
In the next step, you have to install Docker at the Ubuntu VM. This is needed to create and handle the language docker container of Exasol. Fortunatly I found a good guide, how to install Docker on Ubuntu:
Install GitHub
Exasol offers a GitHub repository with different solutions. There can be found all scripts needed to fully automatically create the script language containers.
#install git hub

sudo apt-get install git

#clone exasol repository

git clone https://github.com/exasol/script-languages;
Create a Python 3 container
The Exasol GitHub repository “script languages” contains a guide and all scripts to create Docker language container for different flavors. A flavor is a specific combination of programming language and packages. If you need multiple programming languages, you do not have to create a container for each language. You just define your own flavor with all needed information.
In my case I have chosen the predefined flavor “python3-ds-EXASOL-6.1.0“. This one is suitable for Exasol Version 6.1 and 6.2. If you are still using Exasol 6.0, there is also a predefined flavor. These flavors already contain Python 3 with all TensorFlow packages. I just added following additional packages to the pip installation package list.
html5lib
beautifulsoup4
selenium
BeautifulSoup is needed for scraping data from static websites.
Selium is used for dynamic websites. Beside Selium, Chrome and Chromedriver need to be installed in the docker container. This can be done by adapting the Docker file and adding following lines.
# install google chrome
RUN wget -q -O - https://dl-ssl.google.com/linux/linux_signing_key.pub | apt-key add -
RUN sh -c 'echo "deb [arch=amd64] http://dl.google.com/linux/chrome/deb/ stable main /etc/apt/sources.list.d/google-chrome.list'
RUN apt-get -y update
RUN apt-get install -y google-chrome-stable

# install chromedriver
RUN apt-get install -yqq unzip
RUN wget -O /tmp/chromedriver.zip http://chromedriver.storage.googleapis.com/`curl -sS chromedriver.storage.googleapis.com/LATEST_RELEASE`/chromedriver_linux64.zip
RUN unzip /tmp/chromedriver.zip chromedriver -d /usr/local/bin/

# set display port to avoid crash
ENV DISPLAY=:99
After that adaption, the docker container can be build and exported. Therefor go into the script-languages directory and execute following command.
./exaslct export --flavor-path=flavors/python3-ds-EXASOL-6.1.0 --export-path /home/docker/container/
As the result you receive a standalone archive “python3-ds-EXASOL-6.1.0_release.tar.gz, which needs to be copied to the BucketFS, the internal file system of your Exasol database.
As a last step a cleanup is needed. During the build process, several docker images are downloaded. These should be deleted to save disk space.
./exaslct clean-flavor-images --flavor-path=flavors/python3-ds-EXASOL-6.1.0
Configure BucketFS
As already mentioned, you have to upload the new container to the file system of the Exasol database, the BucketFS. If you just used the database and never used the BucketFS you may have to configure it first.
Enter the EXAoperation of your Exasol Community Edition VM. The IP adress and password is shown in you VM.
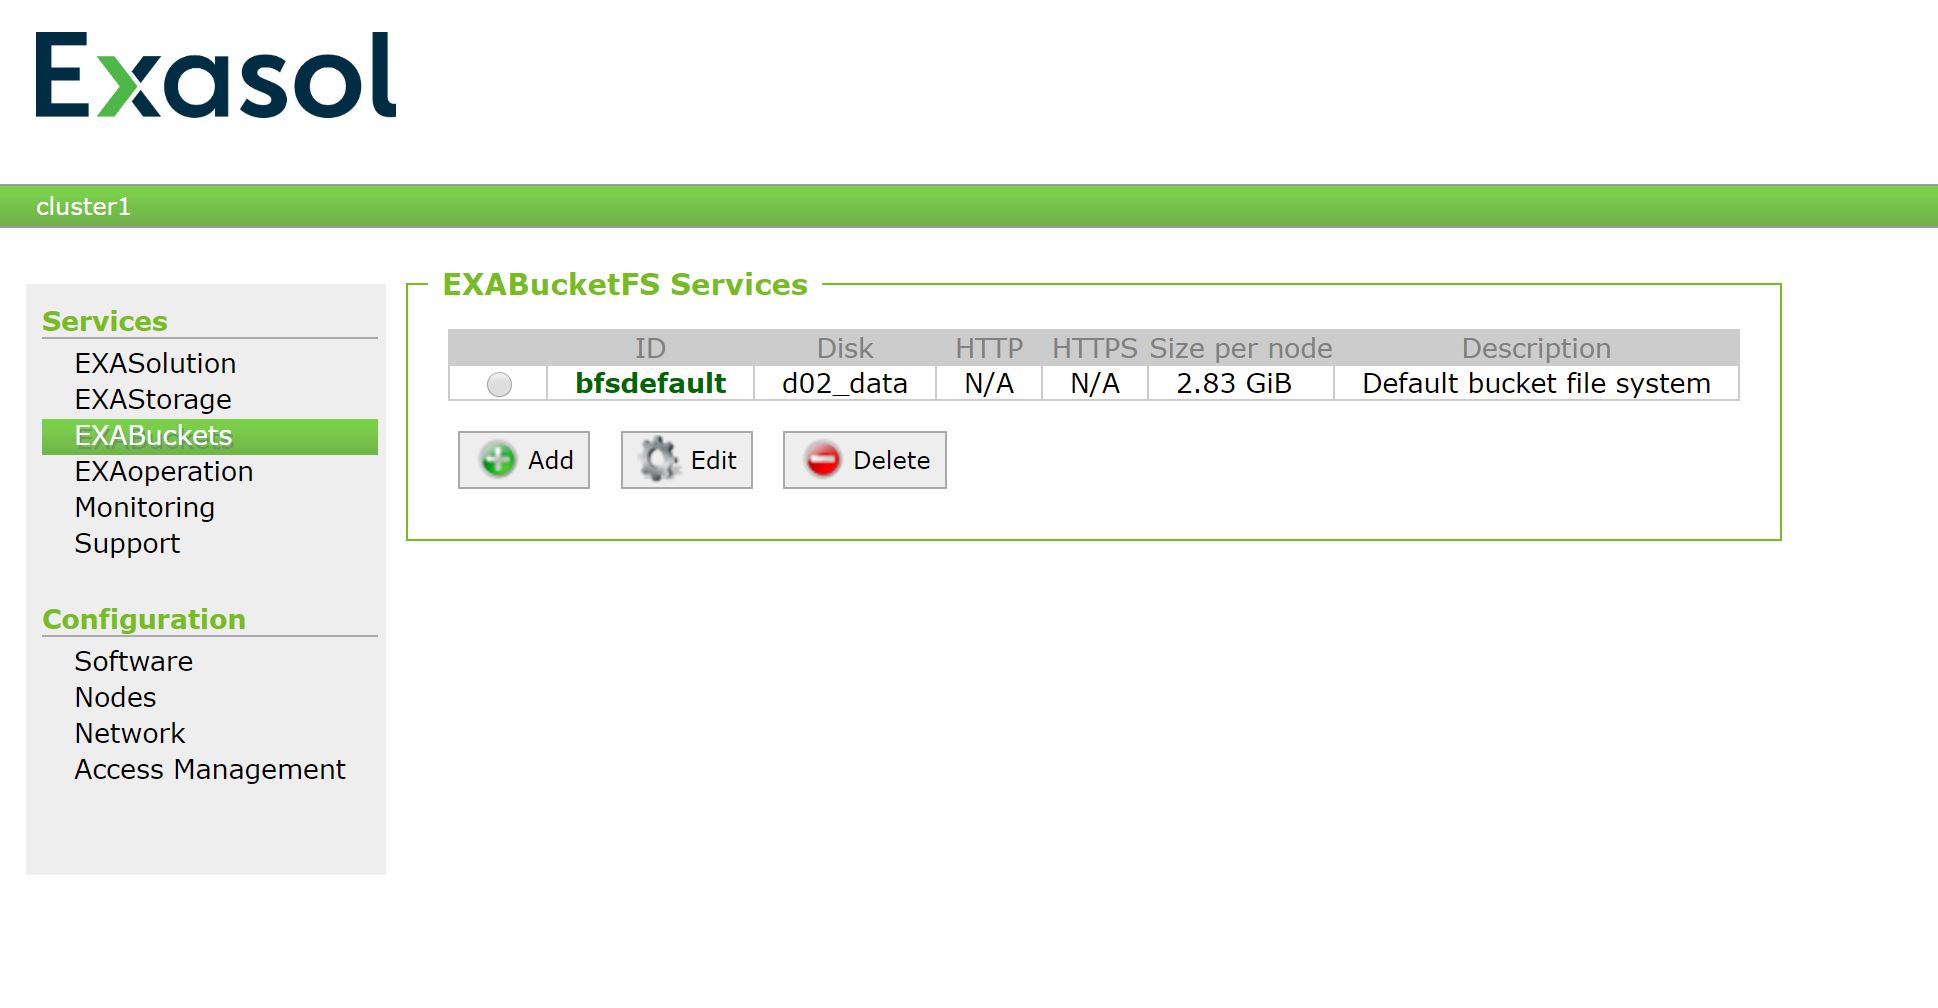
The menu offers you the option to configure the HTTP and HTTPS port for the Buckets. That’s needed, if you want to access a Bucket via CURL command.
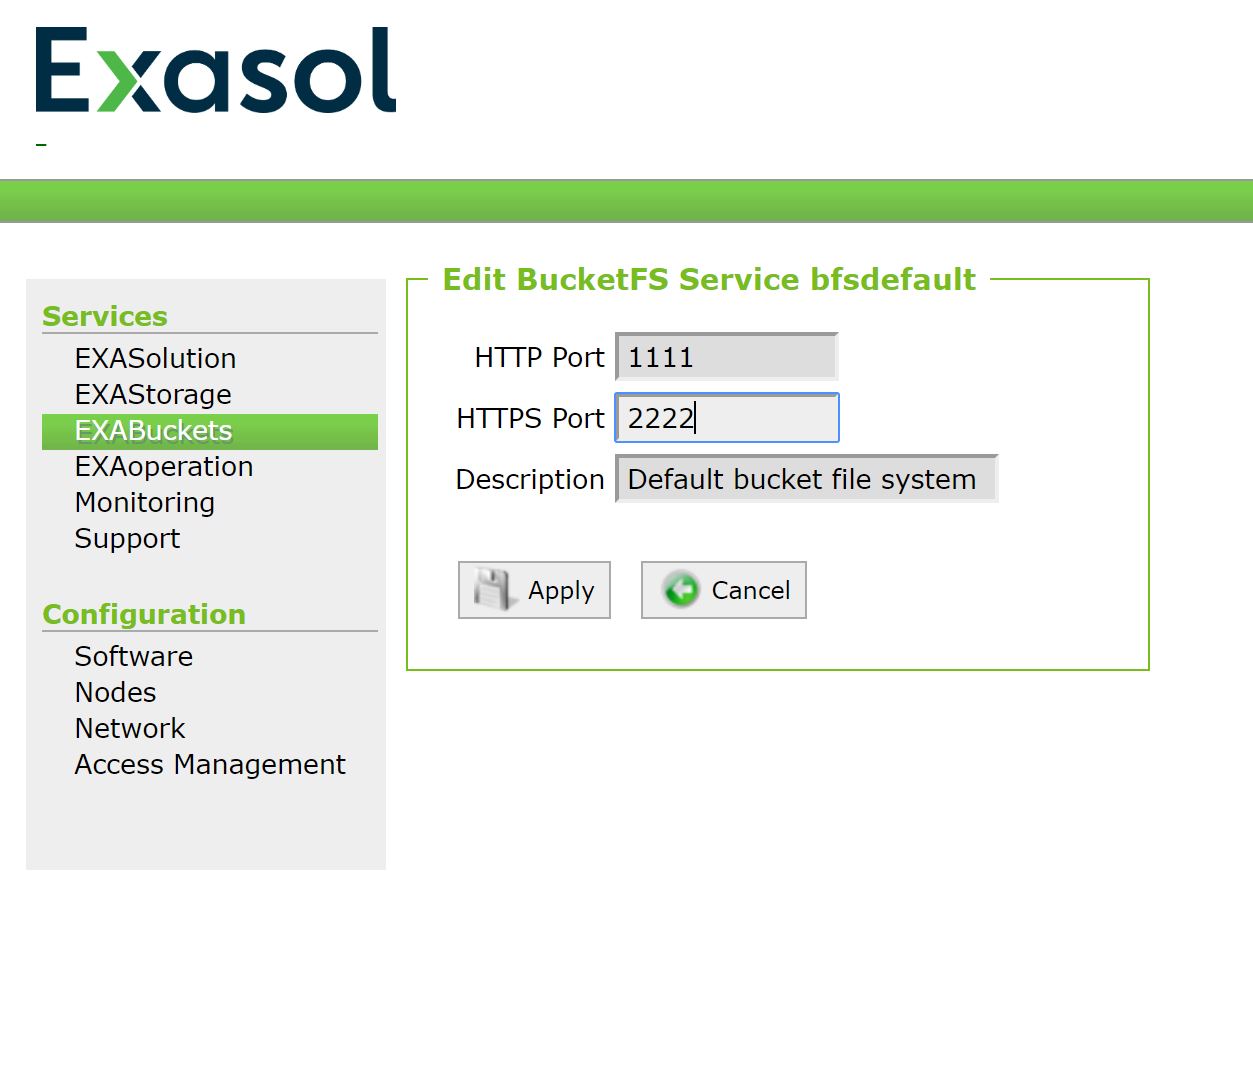
More important is setting the read and write password for the different buckets. This can be done while creating a new Bucket or changing an existing one.

Uploading files to the BucketFS can be done via CURL command. But way more easy is using the BucketFS explorer. This is a small Java program also available at the Exasol GitHub repository.
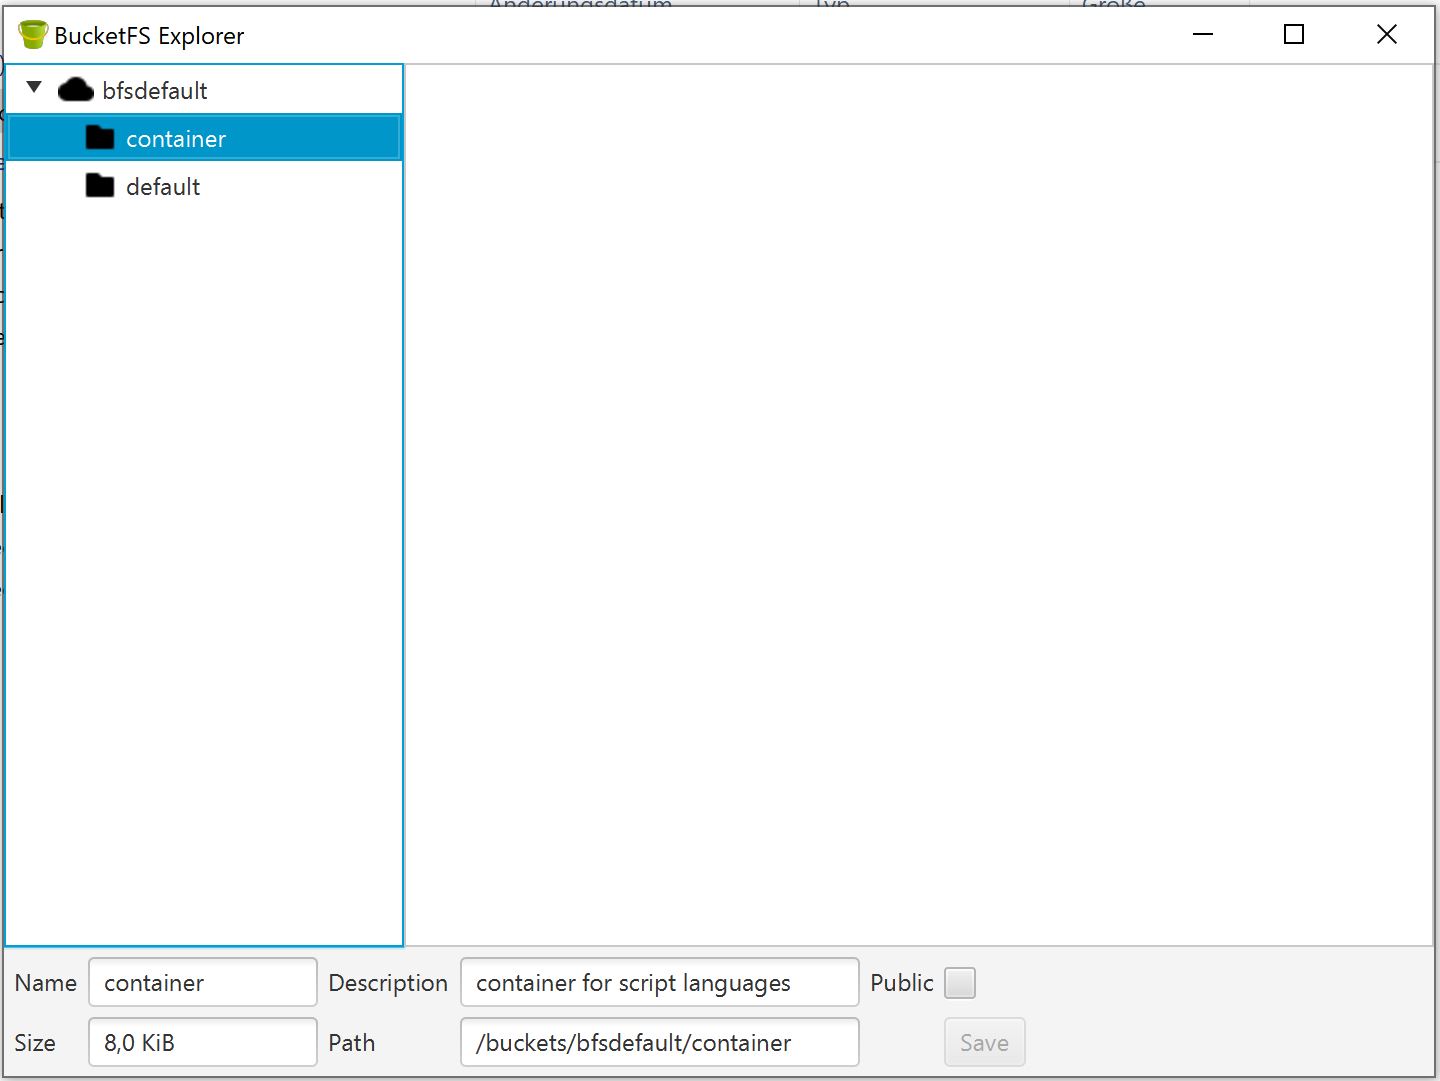
Use the EXAoperations URL and your set write password to read, upload or delete files at all defined Buckets.
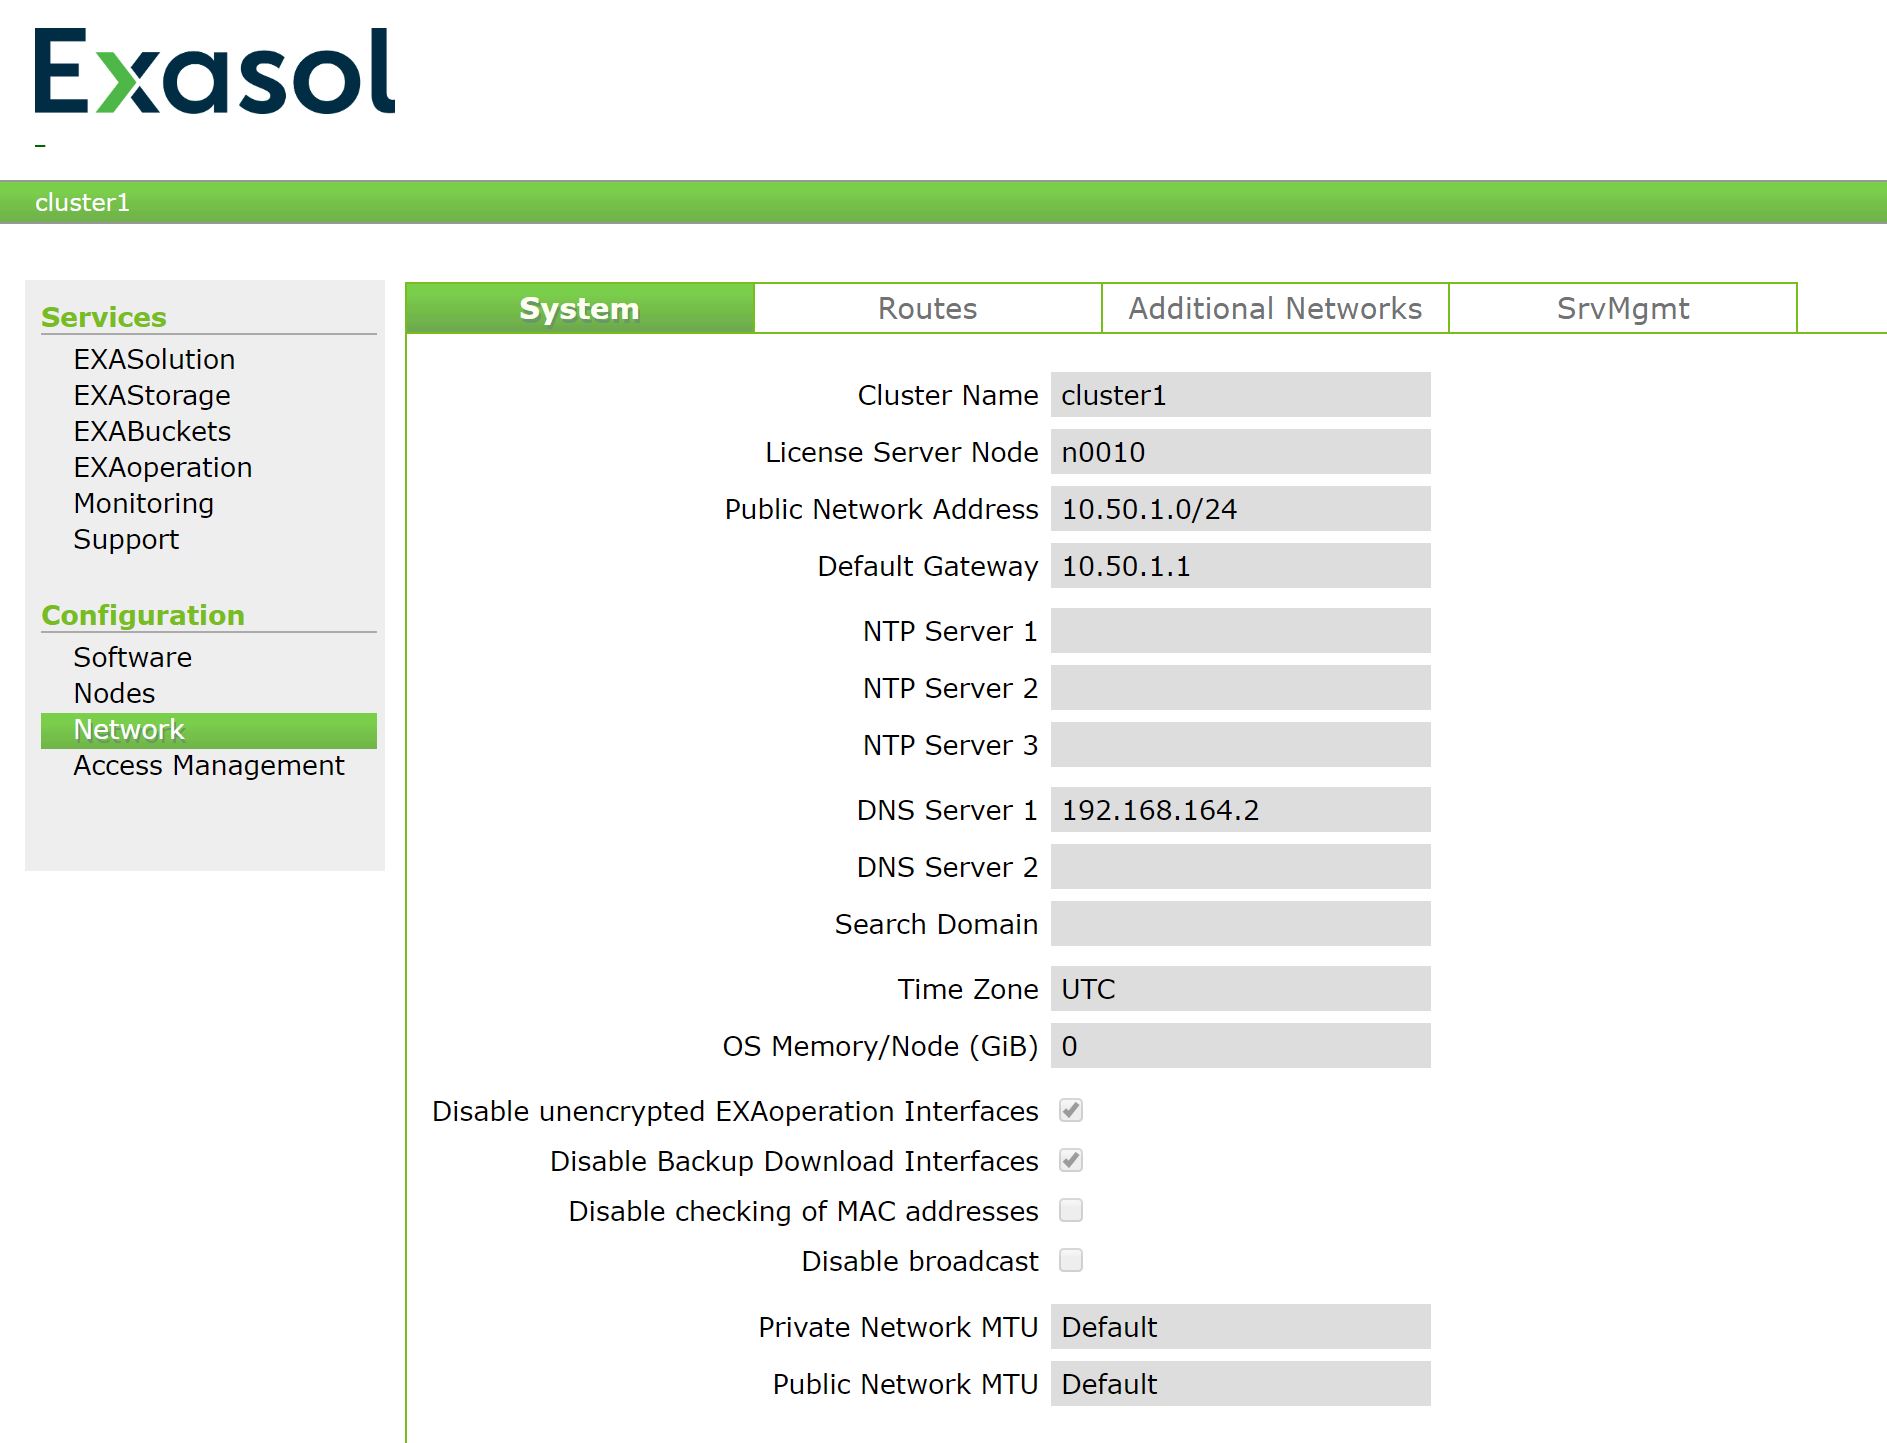
Configure DNS server
To allow the database to communicate with the outside, you have to ensure, that it is able to access the internet. At first you have to configure the network type in the VM player being a shared NAT connection. That’s basically a private network between you laptop and all your running virtual machines.
In a second step you have to add your laptops IP adress as the DNS server in ExaOperations.
Test TensorFlow implementation
TensorFlow is now implemented in your Exasol database. So it’s time to test, whether everything is running fine.
First you have to populate the new TensorFlow container as a new script language:
ALTER SESSION SET SCRIPT_LANGUAGES =
'PYTHON=builtin_python R=builtin_r JAVA=builtin_java PYTHON3=localzmq+protobuf:///bfsdefault/default/python3-ds-EXASOL-6.1.0_release?lang=python#buckets/bfsdefault/default/python3-ds-EXASOL-6.1.0_release/exaudf/exaudfclient_py3';
This statement sets a new path for the Python3 container existing in the default Bucket for the current session. If you permanently want to use the container, you should set this parameter on server level with a ALTER SYSTEM statement.
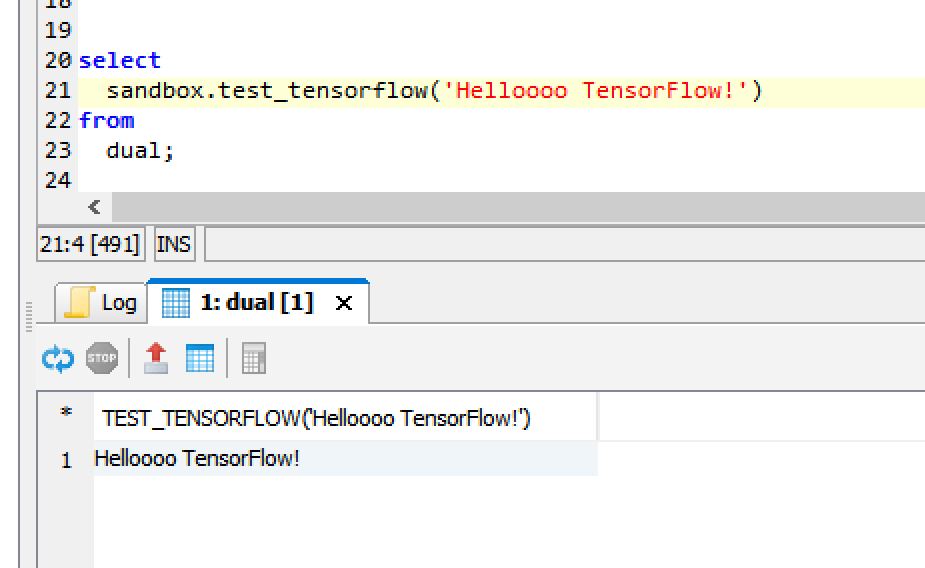
For testing TensorFlow I used a small UDF, which just reads a parameter und returns it by executing the typical “Hello World” example for TensorFlow.
create or replace PYTHON3 scalar script sandbox.test_tensorflow (p_test varchar(100))
returns varchar(100)
as
import tensorflow as tf

def run(ctx):
v_const = tf.constant(str(ctx.p_test))
v_sess = tf.Session()
v_return = v_sess.run(v_const)
return v_return.decode()
;
The created UDF can easily used inside every SELECT statement. That makes such UDFs so powerfull. Instead of just a basic “HelloWorld” UDF, you are able to load a trained model and directly use it on your data.
select
sandbox.test_tensorflow('Hello bla TensorFlow!')
from
dual;
The Result seems to be correct:
Test web scrapping implementation
For testing the Python package implementation for scrapping data from websites I also created two small UDFs.
One for a static website:
create or replace PYTHON3 scalar script sandbox.test_static_website(p_test varchar(100))
  returns varchar(100)
as
import urllib.parse
import urllib.request
from bs4 import BeautifulSoup as bs

def run(ctx):

  #defined user agent
  v_user_agent = 'Mozilla/5.0 (Windows NT 10.0; Win64; x64) AppleWebKit/537.36 (KHTML, like Gecko) Chrome/70.0.3538.102 Safari/537.36'
  v_headers = {'User-Agent': v_user_agent}

  v_url = 'http://www.transfermarkt.de/1-bundesliga/startseite/wettbewerb/L1'

  #load web site
  v_request = urllib.request.Request(url=v_url,headers=v_headers)
  v_response = urllib.request.urlopen(v_request)

  #soup parsing
  soup = bs(v_response, 'html.parser')

  return ctx.p_test
;
And one for a dynamic website:
create or replace PYTHON3 scalar script sandbox.test_dynamic_website(p_test varchar(100))
  returns varchar(100)
as
import urllib.request
import datetime
import time
from bs4 import BeautifulSoup as bs
from selenium import webdriver

def run(ctx):

  #web driver to simulate chrome browser
  chrome_options = webdriver.ChromeOptions()
  chrome_options.add_argument("--headless")
  chrome_options.add_argument("--disable-gpu")
  chrome_options.add_argument("window-size=1024,768")
  chrome_options.add_argument("--no-sandbox")
  chrome_options.add_argument("--disable-dev-shm-usage")

  v_url = 'https://understat.com/league/Bundesliga/2019'

  # Initialize a new browser
  browser = webdriver.Chrome(chrome_options=chrome_options)
  browser.get(v_url)

  browser.close()

  return ctx.p_test
;
Both UDFs not really read data from the site. It’s just about testing whether the Python packages can be imported and whether the Chrome installation was successful.
select sandbox.test_static_website('Hello static website') from dual;

select sandbox.test_dynamic_website('Hello dynamic website') from dual;
Step by step you will add more data sources, models or other functionality to your Exasol database. Therefor you might need to add additional packages. You can simply do this, by re-run the steps for generating a new container and add these packages to the specific files. Using Python inside a database is just so helpful to extend the standard SQL syntax with UDFs.
If you have further questions, feel free to leave a comment or contact me @Mo_Nbg.

One Reply to “”