
Automating data pipelines in AWS was just the first step of moving my betting models into the cloud. Nearly all my calculations were done in a Exasol database and I also want to keep them in a database. So I need to host one in my AWS account. For such use-cases AWS offers virtual EC2 instances. This blog will explain the single steps how to install an Exasol DB in AWS.
What is Exasol?
A data lake in AWS is great to handle and store a big amount of data – raw data, semi-structured data or just data you are currently not aware of, how to use it. But as soon as you know and understand the structure of your data, it’s time to think about processing your data in a relational database. Analysing data in a predefined schema is just faster and easier. Exasol is my favoured relational database for analytical tasks. With parallel processing, columnar storage and analytical functions it provides some great analysis-oriented features.
AWS EC2
AWS offers a huge software-as-a-service (SaaS) infrastructure. But not each 3rd party tool is also available as such a service. AWS elastic computing (EC2) provides the possibility to create virtual instances, to host own or 3rd party applications or services. In my case an EC2 instance is needed to host the Exasol database.
Infrastructure as code
Running an EC2 instance requires configuring multiple infrastructure components: instance type, storage, network. To shorten and automate this process AWS offers CloudFormation as a service to define infrastructure as code. Exasol provides configurable infrastructure templates, which shorten the process of setting up such an Exasol EC2 instance dramatically.
AWS EC2 key pair
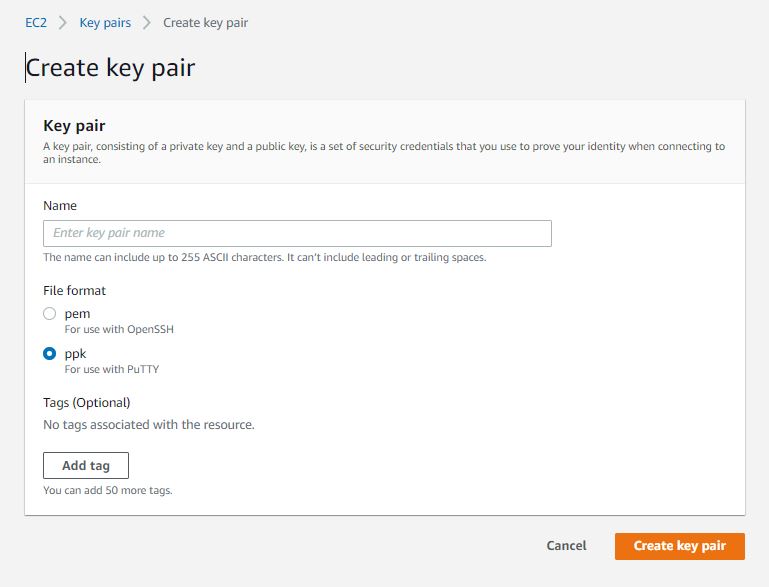
When connecting to an EC2 instance with e.g. SSH, you have to authentificate with a private-public-key. Such a key pair has to be provided during the installation process of an Exasol database. Therefor it’s important to create such a key before configuring the instance. The public key is stored in the EC2 instance. The private key should be stored in a secure place.
Exasol cloud wizard
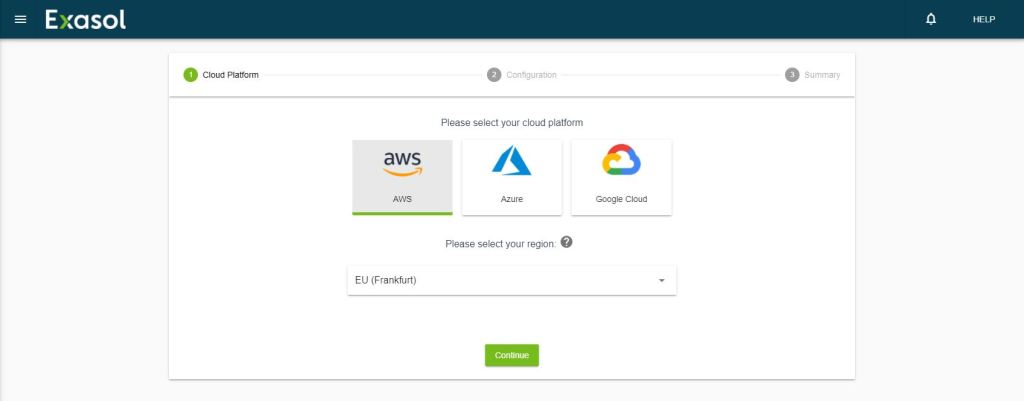
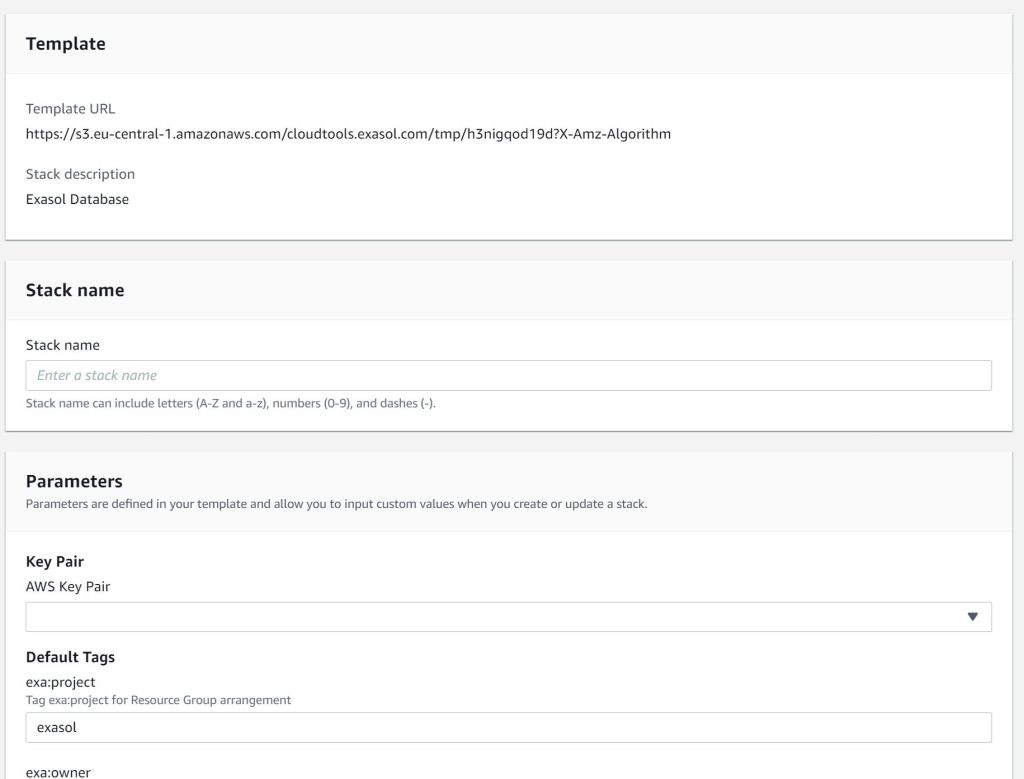
As already mentioned, Exasol uses configurable Cloudformation templates to make the installation process a bit easier. To make it even more easier, they offer a web frontend, which leads through the configuration process. In my case, I want to create an Exasol instance in my AWS account.
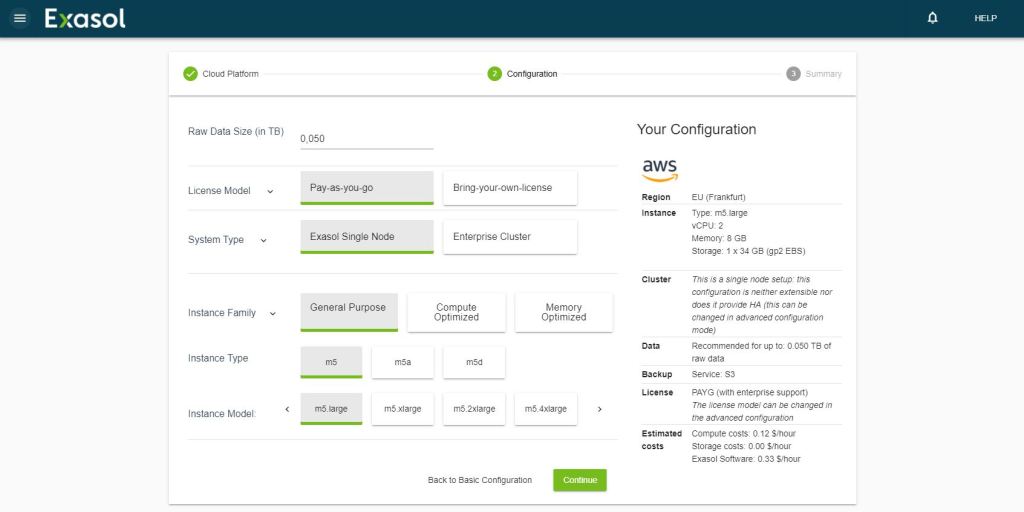
At the 2nd page you have to configure your installation. I switched to the advanced configuration as you are able to choose a smaller setup. In my case, I just want to process a small amount of data. Starting with a m5.large instance should be fine. This combined with the single node system type is nearly equivalend to the VM community edition setup, I used on my Laptop. For licensing there are two different options. Ether you own a license or you have to choose the pay-as-you-go-license, paying just the usage time per hour.
And that’s already all. The next page directly leads you to the final step of launching the stack.
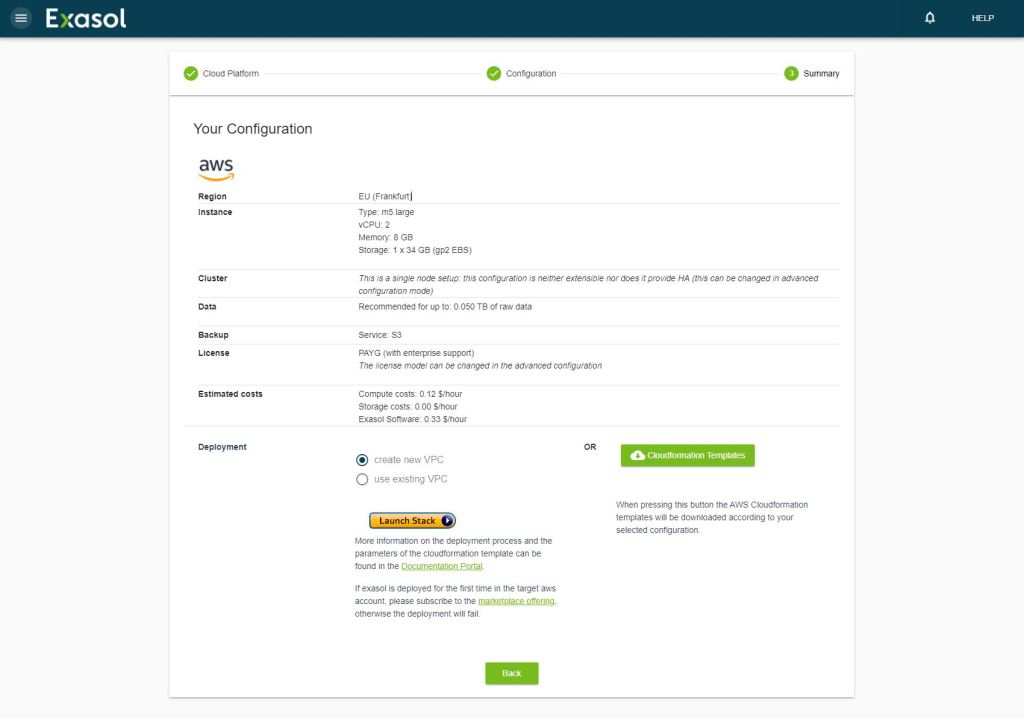
After launching the stack, you have to provide some additional information: a stack name, the created AWS key and passwords for the sys user as well as for the Exaoperations administrator. If you already used an Exasol DB before, this should not be to new.
Public IP and security groups
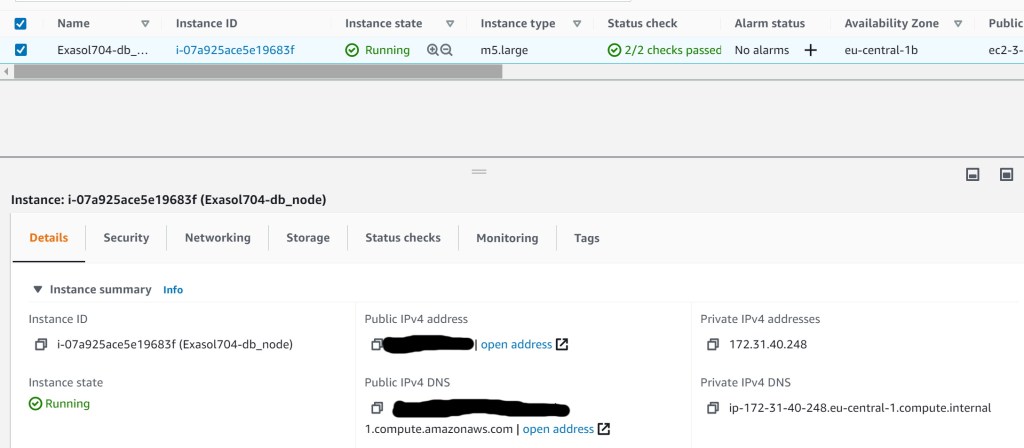
After the whole creation process of the cloudformation stack, you got an EC2 instance running an Exasol database. The instance now provides a basic VPC network configuration. There is a public IP4 adress and host name, which are reachable from the internet.
To ensure nobody else it able to connect to the public IP, it’s possible to whitelist a list of source IPs. Therefor you have to go to the security group of the instance and adapt the input rules. All imporant ports should already be listed. You just have to change the source to “My IP”, what automatically inserts your current public IP address.
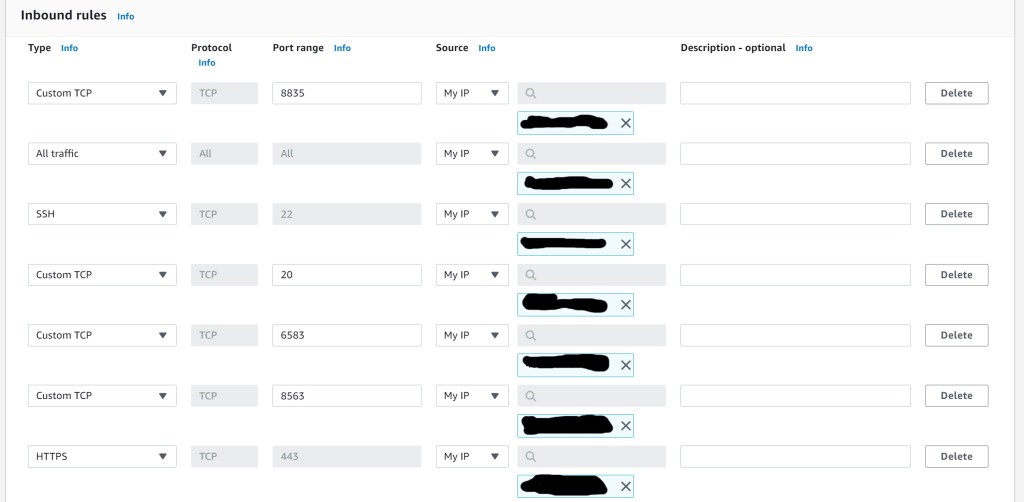
Just to clarify: This is really just a basic network configuration. I am definitely no networking expert. Ideally you use a vpn conncetion to your AWS account and don’t have a visible database host. But that’s the easiest and safe solution to get access to your Exasol database.
Automatic start-stop for EC2 instances
EC2 instances are payed for each single second then instance is running. So while the Exasol database is not used or needed, it’s a good idea to stop the instance and save costs. There are basically 3 options:
1) Starting and Stopping an instance on scheduled times
2) Starting and Stopping an instance before and after Glue jobs
3) Starting and Stopping an instance based on event triggers
At first you have to create a Lambda functions for starting and stopping the instance. This lambda function afterwards can e.g. be triggerd by a cloudwatch scheduler.
Costs
As I already did it in the last post, I again also want to take a look at the cost side. Running a EC2 instance produces definitely more costs than executing some single Glue Jobs. The pictures show the pure standby costs for March, without starting the instance at all. Looking the costs per service reveals that the VPC endpoints and the EBS storage produce about 75% of all costs for such a small configuration. The cost of a larger system is mainly determined by the size of the expensive EBS storage.
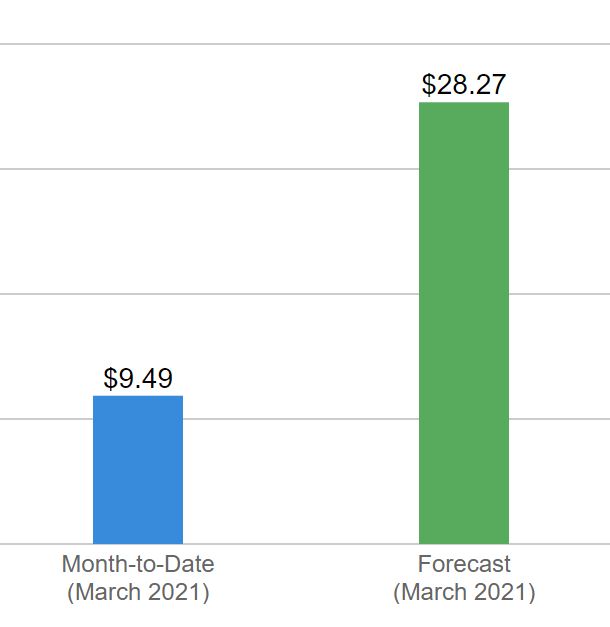
Monthly cost prediction 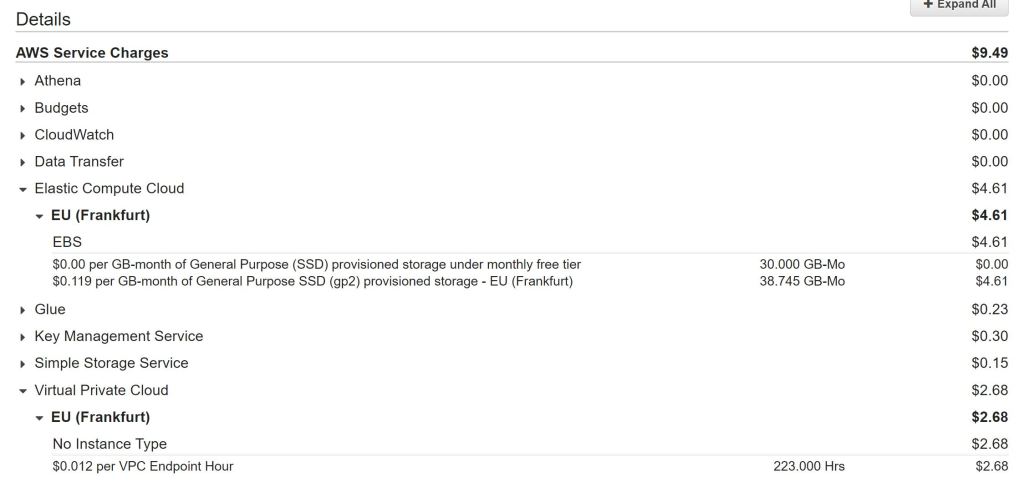
Running costs by service
Conclusion
Using AWS own services like Glue and S3 starts with really low costs. But hosting an EC2 instance will increase your monthly bill definitely. Can you do without the costs? Not if you want to use an analytical database like I do. Are there cheaper alternatives to Exasol? Not really. Taking a look at the possible AWS RDS db instances reveals a similar cost structure.
If you have further questions, feel free to leave a comment or contact me @Mo_Nbg
Sources:
https://luminousmen.com/post/schema-on-read-vs-schema-on-write
https://docs.aws.amazon.com/cli/latest/userguide/cli-services-ec2-keypairs.html
https://aws.amazon.com/de/premiumsupport/knowledge-center/start-stop-lambda-cloudwatch/
